BLOG AJ Page - Start The Art
Start the Art

>> What you need:
- A5 white card
- Archival ink – Jet Black
- Distress ink – Worn Lipstick, Crushed Olive, Peacock Feathers, Hickory Smoke
- Distress Spray Stain – Hickory Smoke
- 2 ½ inch brayer
- Creative Expressions Rustic Birds clear stamp set – splattered border
- Bee Crafty Inspired by Banksy clear stamp – Greatness Words
- Jane Davenport DIY Face clear stamp set – eyes
- Leonie Pujol clear stamp set Swirls and Flakes – little stacked hearts
- Jane Davenport washi tape Faces – white face
- Jane Davenport washi tape Miss Match – watercolour swatches
- Jane Davenport Journal Tape Book - Strips and Phrases – Start the Art
- Black Sharpie
- Tim Holtz Travel Stamp Platform
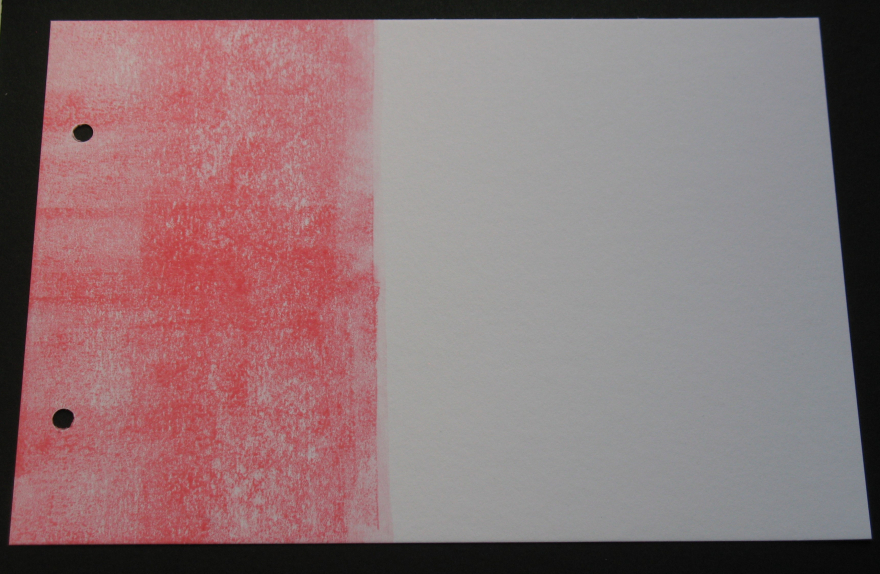
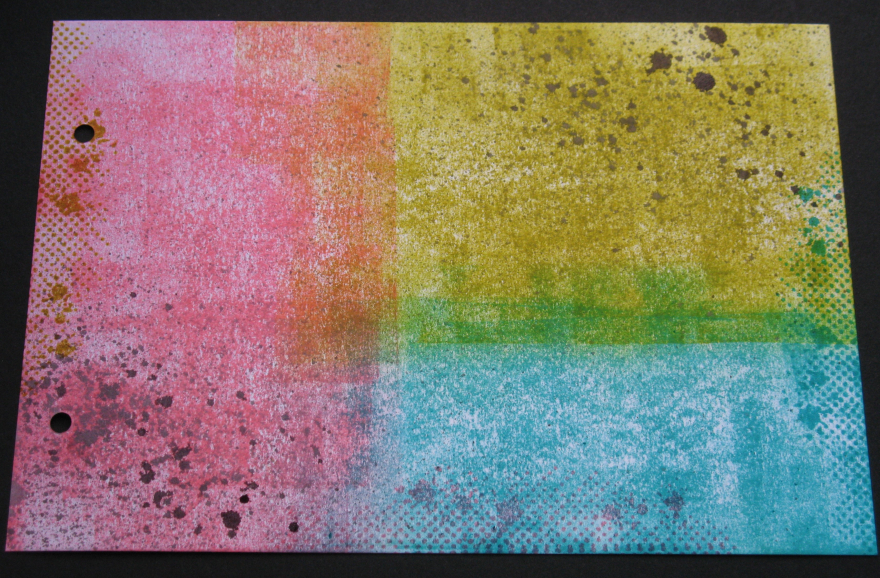
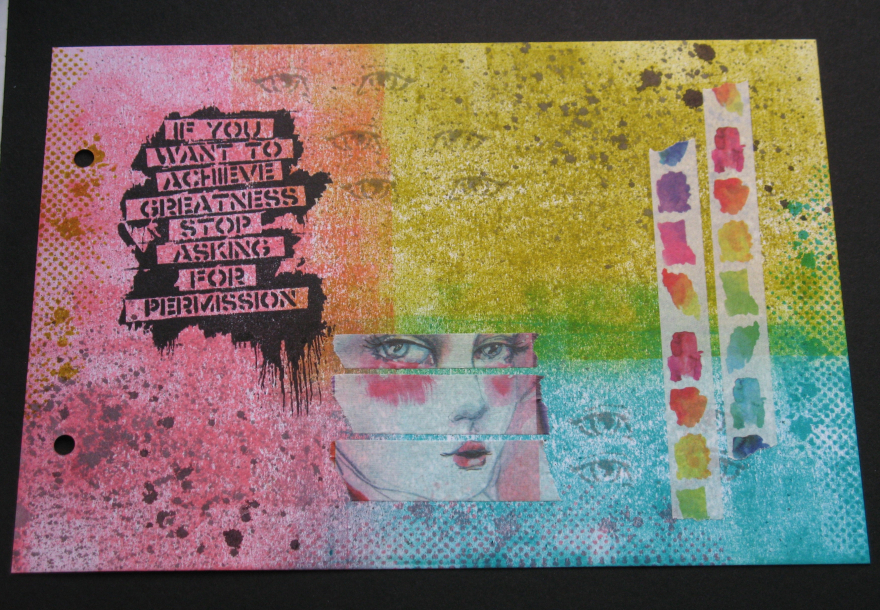
Step 1: Load your brayer with Worn Lipstick and cover the left side of your page, just over a third of the way.
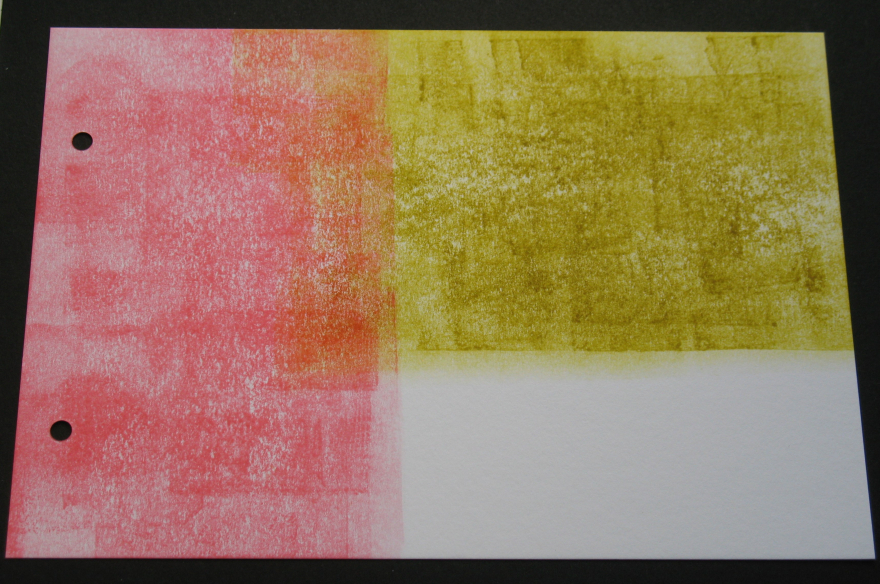
Clean and dry your brayer, then load with Crushed Olive and apply to the top right section. This is easiest if you turn your page so that the white portion is at the bottom and you roll up and down. This time, cover about two thirds.
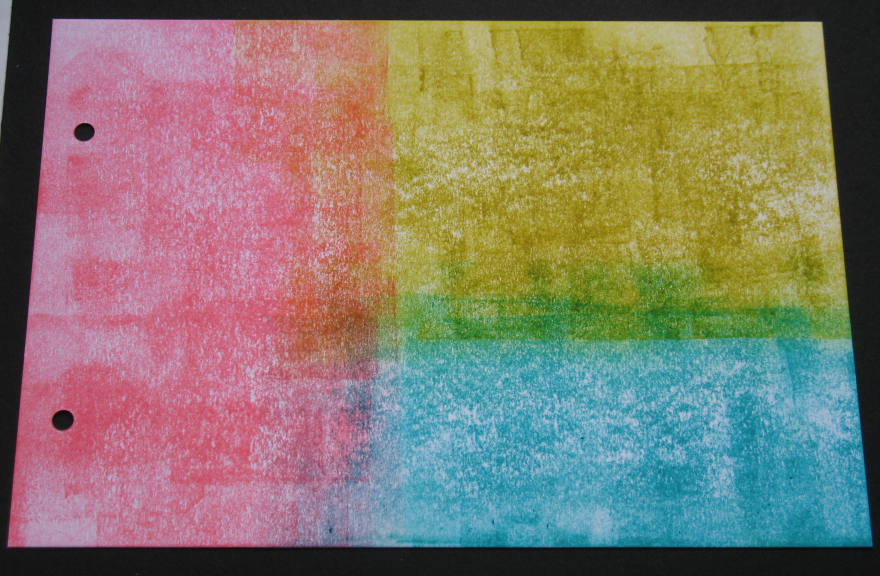
Clean and dry your brayer, load with Peacock Feathers, and cover the remaining area. Overlap and blend the colours a bit as you apply the Crushed Olive and Peacock Feathers to get some extra colours and add interest. When you are happy with the background colours, turn your page back to landscape orientation.
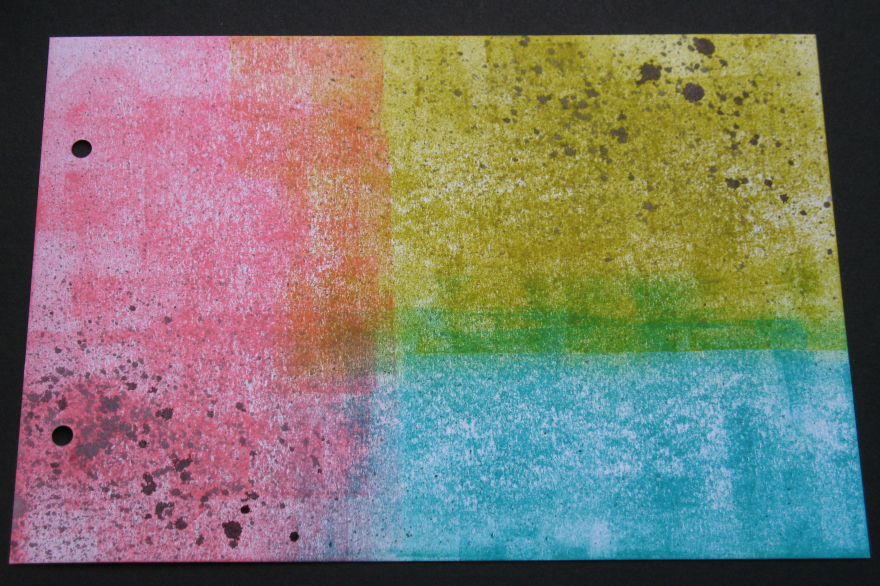
Step 2: Spritz some Hickory Smoke Spray Stain in the bottom left and top right corners. Leave to dry.
Step 3: Stamp the splattered border onto all but the top edge. Use Worn Lipstick on the bottom edge, placing it mainly on the blue area, Peacock Feathers on the right edge, and Crushed Olive on the left edge.
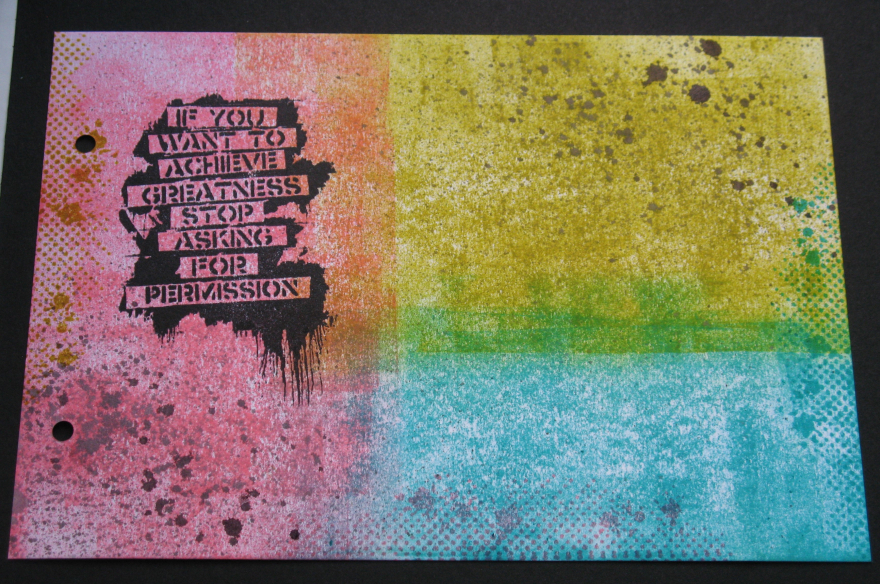
Step 4: Using your stamp platform, stamp the Greatness Words in the top left with Archival Jet Black. Do a second application of ink if needed to get a solid black image.
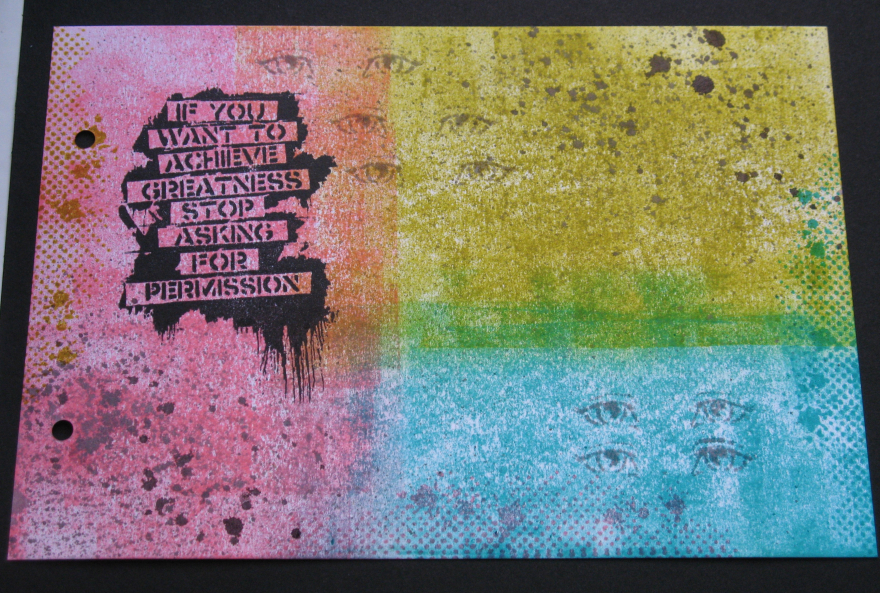
Step 5: Use Hickory Smoke to stamp the eyes several times as shown.
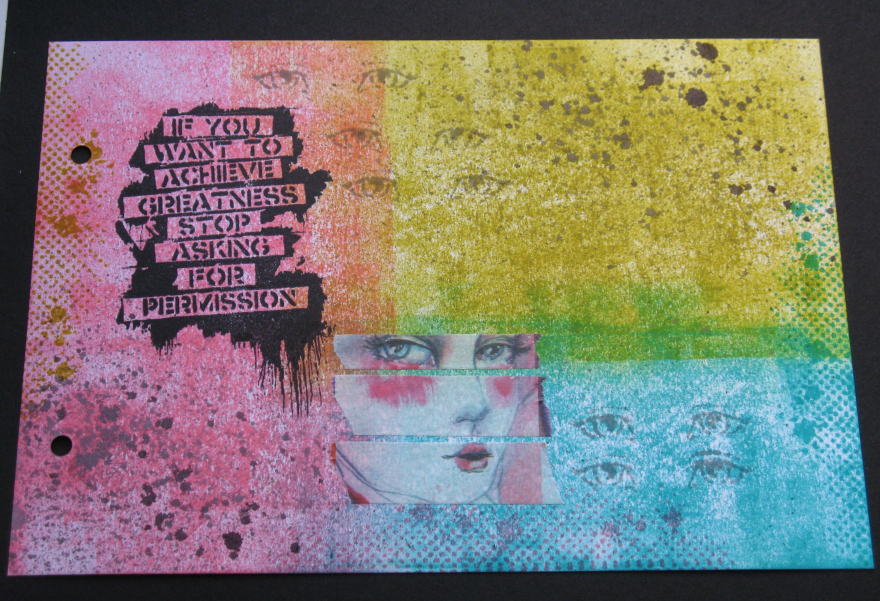
Step 6: Add the washi tape face leaving a gap between each piece and lining up the nose and cheek. Just tear the washi tape – it gives an interesting jagged texture which contrasts well with the long straight edges of the tape.
Step 7: Add two long strips of watercolour swatch washi tape on the right side as shown. Again, temporarily turning the page to portrait orientation makes it easier to line them up with the edge to get them straight.
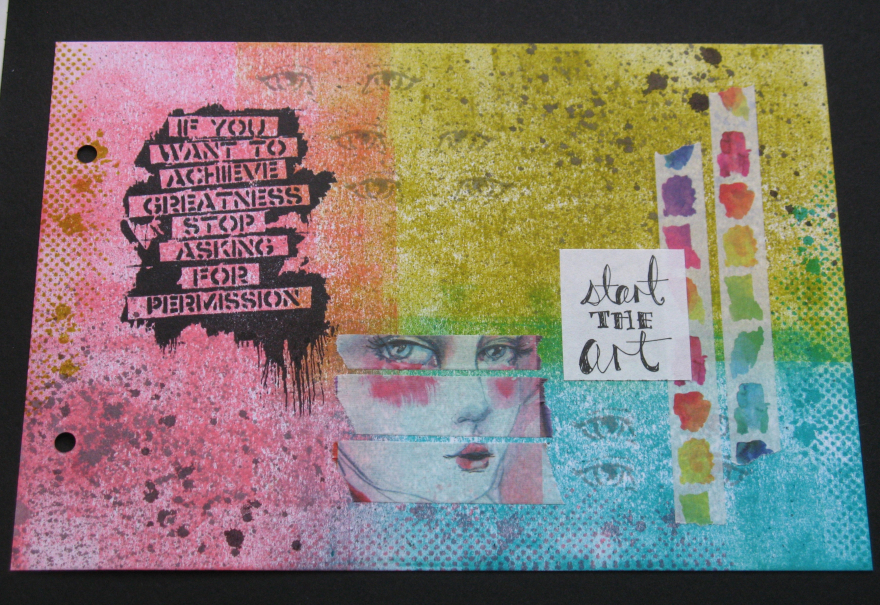
Step 8: Add the Start the Art sticker, overlapping the edge of the washi tape.
Step 9: Using Jet Black and the stacked hearts stamp, add some detail as shown. This will visually tie in with the fine black lines of the script on the sticker and balance out the black areas.
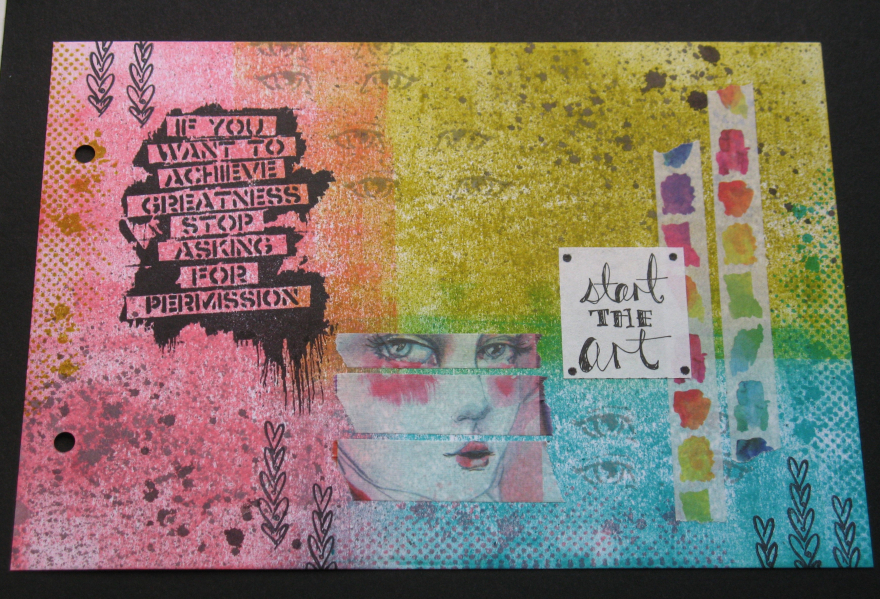
Step 10: Lastly, using the tip of the black Sharpie, place a dot in each corner of the sticker to anchor it and draw the eye in.
TOP TIP #1: A brayer is a great tool for applying ink! It’s really quick and gives varied coverage which creates instant visual texture.
TOP TIP #2: Don’t be afraid to mix and match your favourite stamps even if they’re from several different sets – quirky is always good!
I hope this step-by-step inspires you to start YOUR art! x
